Made two cards and a larger box for the paper pumpkin for August....here are the pictures....
for the card below I took the negative shape left and cut it out and glued it onto a scrap piece of foil paper I had...then I took the black tag and cut off a piece from the bottom...1.5 inches for tag...embossed in gold...
added the gold bow...I used our new glue pen....love it!!!
I also took the negative space for this shape and sponged it with pink pirouette...used our stamps in the kit and used our versamark pad and gold embossing powder...and then added a couple of punches....
Took two of the small boxes and made a big one....I am not mechanical so this probably could have been done a better way...lol...
I cut what would be the inside middle except for the tabs to connect to each other....
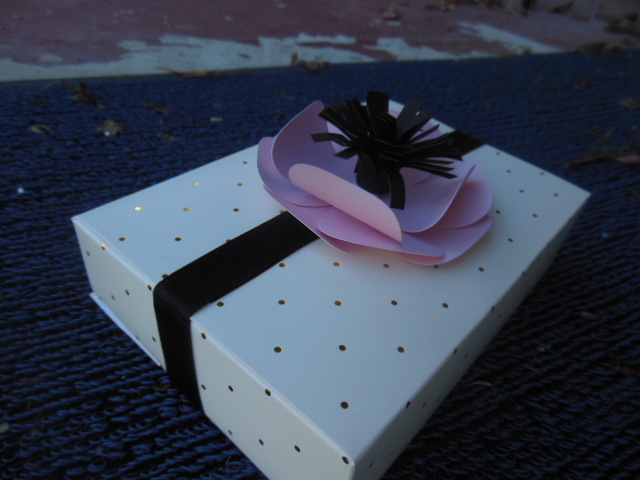
this box is not glued together at the top....it is simple one tab laid over the other underneath the ribbon
you will have two pieces that look like this......
after you cut
and two pieces cut that will look like this....
when you use the tear and tape and connect the two pieces...they will look like this...
you connect the sides and they will look like this..and yes, they will be wobbly until you put the ribbon on....you could reinforce with a piece of paper or chipboard/I use our paper dividers that come in the pack of paper...
put tear and tape on the tabs shown
turn the boxes over and attach the piece you put together...
when you look at the inside of the box it will look like this....the tabs are stuck under
this is the bottom of the box facing you
the inside of the box needs to be reinforced....
so will used the paper divider sheet cut to the dimensions shown below...this is a tight fit so you may decide to make it a little smaller...
use the tear and tape before inserting..
now turn to the top of the box and just fold down and add the ribbon...and yes, the sides will be wonkie...
after burnishing this area...add the ribbon and topper..


No comments:
Post a Comment